
Devices are the hardware that are attached to your POS workstations. Devices allow you to do things like print receipts, process a credit card payment, and make change from the cash drawer. If one of your devices stops working, use some of these methods to troubleshoot.
Printing Issues:
Receipts Will Not Print (Epson TM-T88 V):
- Check paper in the printer – If paper needs to be replaced, please refer to the BlueBook – Yellow Section – Page 3
- Is the Printer Spooler service running?
- Does the printer have power?
- Power toggle switch is on the front, right hand side
- Power cable is on the back left side of the receipt printer
- Make sure there is power to printer, try paper feed.
- Check for multiple instances of CP
- New Device Framework attaches all peripheral devices to the first instance of Counterpoint that’s open.
Receipt prints blank:
- Make sure paper is loaded correctly. Paper should feed from the bottom of the roll, not from the top.
- Make sure paper is ‘seated’ correctly in printer.

Unable to print reports:
- Check print queue and clear any clogged documents (may need to restart the print spooler).
- User logged in does not have reports available on their menu.
- Check paper in printer and check power to printer.
- Default Windows printer may have changed.
Unable to print labels:
- Check power to Laser printer.
- Check that labels are loaded correctly.
- Close out of Counterpoint → wait 15 seconds → log back in.
- NiceLabel Errors – when triggered – require closing out of the application and logging back in.
- Permissions Problems – check the second on permissions for EuroPlus above.
Error Printing labels: “VARIANT DOES NOT REFERENCE AN AUTOMATION OBJECT”:
- Review label printing filter.
- Check for proper printer selection, label job, label code, and item # selected.
Cash Drawer:
Drawer Will Not Pop Open:
The Cash Drawer is a “Printer Driven Cash Drawer”, which means what affects the printer will have an effect on the Cash Drawer.
- Make sure receipt printer is on and has paper
- Check cables/connection between receipt printer and drawer,
- Restart print spooler
- Check lock on drawer
- Check for multiple instances of Counterpoint
- Test device from Setup/POS/Devices
- i. Select the Cash Drawer and enable for testing – cash drawer should pop open
Drawer pops open slightly:
- If the Solenoid pops, but the drawer only open slightly, there might be rolls of coin jammed in the tray, inhibiting the normal function of the drawer.
Drawer pops but won’t open:
- Check the lock in the center of the cash drawer. If the drawer “pops”, it’s trying to open. A physical key might be needed to unlock the drawer.
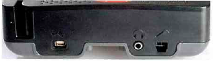
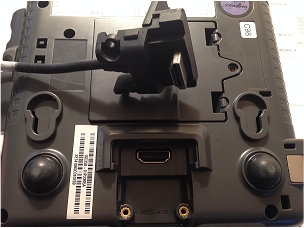
Pin Pad: iSC250 Model
Components:
- iSC250 Pin Pad
- Stylus
- Data Cable
- Power Supply (Multipoint Port Connection)
Payment Options built into the iSC250 Pin Pad:
- MSR – Reads tracks 1, 2 or 3
- Smart Card (aka Chip & Pin)
- Contactless – Not Currently Supported in Counterpoint
Card does not read:
- Swipe the Card at a slower or faster rate
- Flip the Card around and try a different direction
- Inspect the Magnetic Stripe on the card to make sure it’s not scratched or badly worn
- Manual Entry may be required for non-swiping cards
No Information is visible on the Pin Pad Screen:
- Make sure that the iSC250 cables are all securely connected (Power and Data Cables) On XR7 stations, the Ingenico is connected to COM2.
- Restart the Device by pressing Clear and [ – ] on the Pin Pad keypad simultaneously
- Power off the register. Reset all cables. Power the register back on.
- If you have another working isc250 device, swap JUST the devices to see if the problem follows the pin pad, or stays with the current workstation.
- If it follows the Device: RMA the device
- If it stays with the workstation: Replace the Data Cable
Alert Irruption:
- The isc250 detects any “tampered state” and the pin pad will repeatedly flash the message “ALERT IRRUPTION!!”
- If you see this message on your pin pad, contact your Manager and Randall Data Systems.
UPS:
Beeping without a Power Failure:
- If the UPS starts to beep, verify that the main power cord for the UPS has not come unplugged and that the building or outlet has not lost power.
- If everything is connected properly and there is still power, save whatever you are working on and safely shutdown the computer. For instructions on how to do this, please refer to the section entitled Startup/Shutdown Procedure.
- Once everything has been powered off, press the Power Button on the UPS located on the top of the unit opposite where the main power cable is. The green status light should turn off.
- Wait for 10 seconds and then turn the UPS back on.
- If the UPS begins to beep again, turn it back off, and contact Randall Data for support. If the unit does not start beeping, power everything connected to it back on.
Beeping during a Power Failure:
- In the event of a power failure, the UPS will continue to provide power to all devices plugged into the Battery Backup/Surge side of the UPS for a limited time.
- Follow the instructions in the section entitled Startup/Shutdown Procedure to avoid any potential loss of data. DO NOT continue to use the computer until it shuts itself off. Doing this may result in severe damage to computer components and potential loss of data.
- To stop the UPS from beeping, press the power button located on the top of the unit opposite where the main power cable is. DO NOT press that button until all devices connected to the UPS have been turned off.
- Once power has been restored to the area, simply press the power button on the UPS, and once the status light is green, power on all devices connected to the unit.


