
Occasionally you might need to investigate your tickets. Often, you have limited information to work with. Maybe you have a repeat customer who feels that they have been double-charged, or maybe you have a customer that is not sure how their balance got so high. You can use these tips to better understand what occurred in one transaction or to a customer’s account.
Step 1: Gather Data
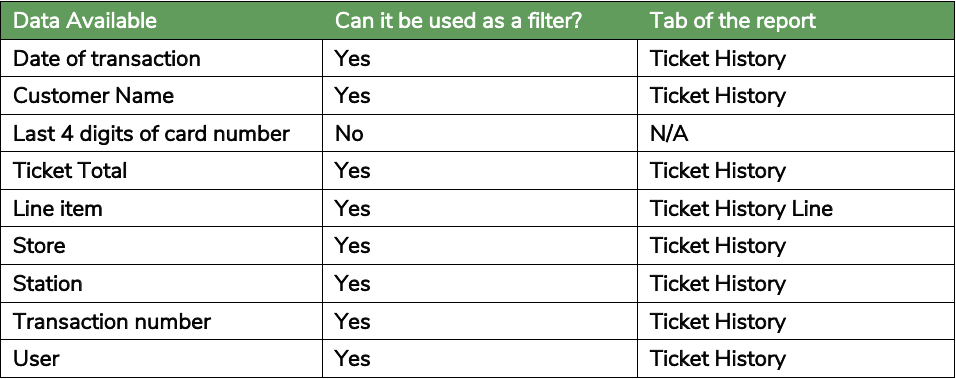
Prior to searching in Counterpoint, try to get as much information as you can, such as:
- Date of transaction(s)
- Customer Name
- Last 4 digits of credit card number
- Ticket total
- Line of item(s) from transaction(s)
- Store
- Station
- Transaction Number
Step 2: Using Transaction Data to Find Ticket
Using Ticket Reports
- Select Point of Sale → Reports → History → Ticket History
- Check the boxes for
a. Print line items
b. Show payment detail
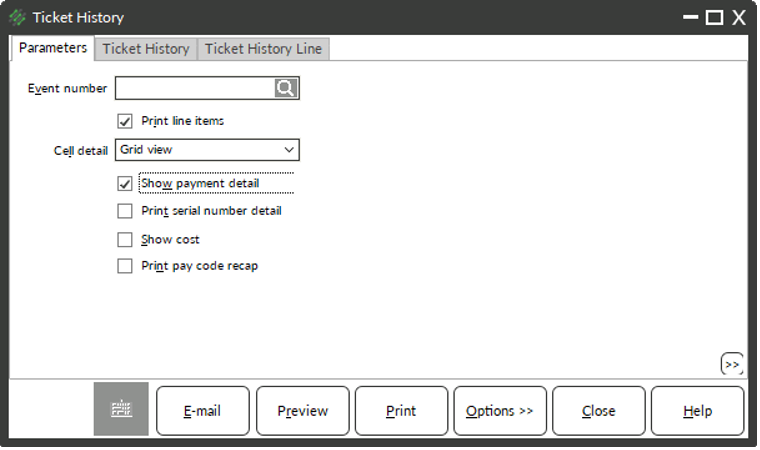
- Use filters to limit the results of the ticket history
- Click Preview
- (Optional) Click the Binoculars in the Preview Toolbar to search for keywords

Using the NCR Secure Pay Portal
The NCR Secure Pay Portal is a great resource for researching credit transactions. If a customer reports that they were charged twice, you might want to start with the portal.
- In a web browser, navigate to portal.ncrsecurepay.com
- Log in with your store’s Secure Pay user and portal password
- Click the Advanced Search tab

- Enter a date range
- (Optional) Choose a Card Type or Transaction Type from the drop-down menus
- Click the Magnifying Glass
- Click a column header to sort by that column
- NOTE: You can sort by transaction amount or card number
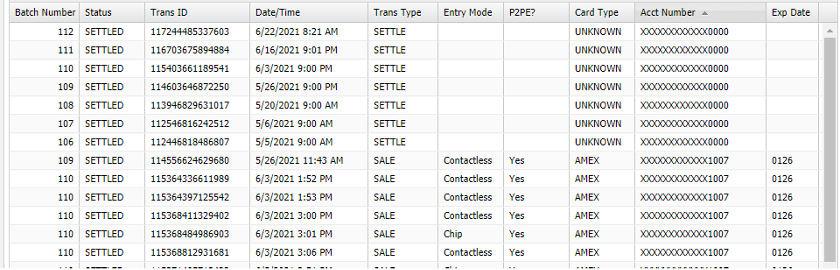
- Review data in the table
- Scroll to the right to view the corresponding ticket numbers in Counterpoint
- NOTE: If you Counterpoint ticket numbers contain a hyphen (-), you will need to add it into the ticket number when searching in Counterpoint.
Step 3: Reviewing Ticket Data
Once you have found the ticket number, you can use View Ticket History to see more information about the ticket.
- Select Sales History → Views → Ticket History
NOTE: If you need to view an unposted ticket, select Point of Sale → Views → View Tickets instead - Enter or look up the ticket number
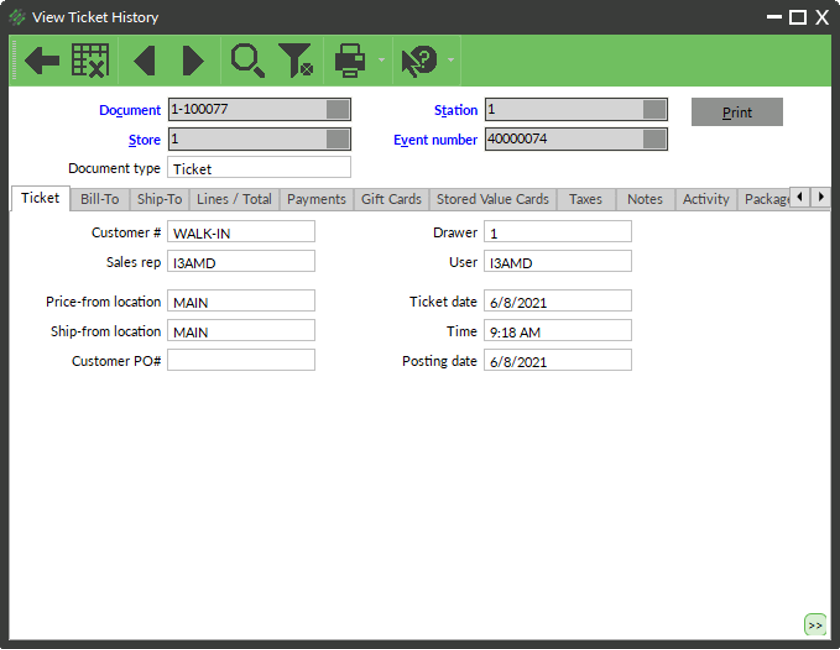
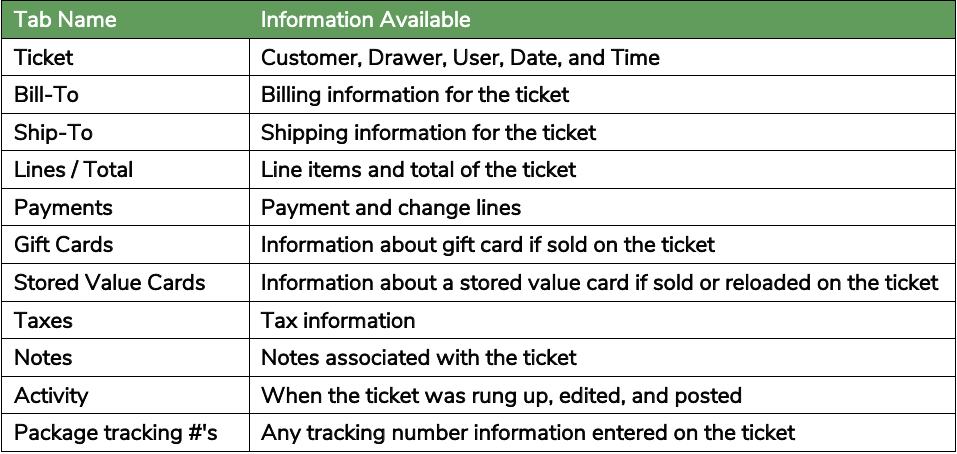
- Use the tabs of the View window to review data
Step 4: Printing Ticket
- From the View window, click the arrow drop-down next to the Printer icon in the toolbar
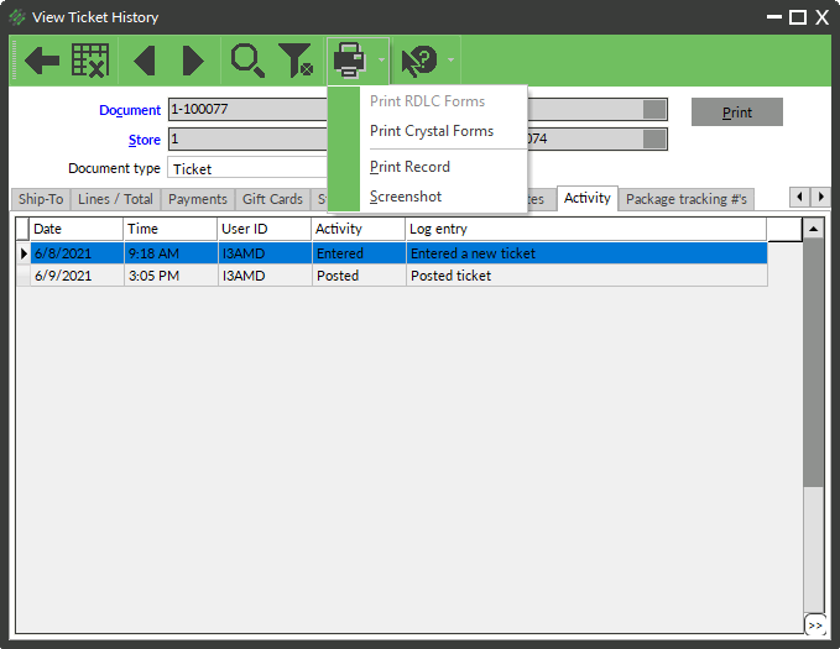
- Choose RDLC forms for receipts that go to a receipt printer or Crystal forms for receipts that go to a Windows printer
- Choose a receipt style from the Report drop-down
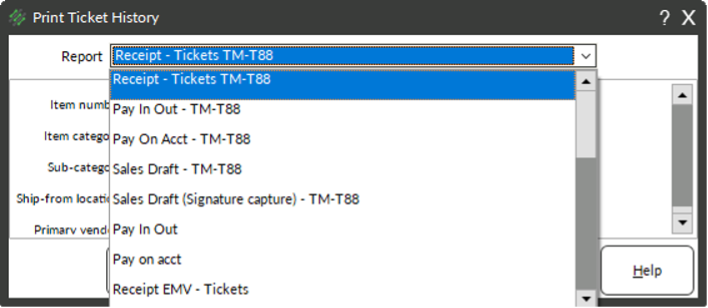
- Click Preview
- Click Print


