
The load lookup process used with the Cipher handheld data collectors allows you to load a list of items and barcodes from Counterpoint to validate barcode scans against. If the item number or barcode is not in the lookup file, the cipher will beep alerting the user that it does not recognize the barcode as being on file. Those items that are not on file can either be put aside to deal with later or taken to the count manager for remediation. By default, the load lookup process attempts to load all items in your inventory into the cipher’s memory, but there may be a business need to only count certain items in your inventory. You can create a custom lookup file to limit your lookup and load it into the cipher to validate barcode scans.
Creating and Saving Lookup File Parameters in Counterpoint to Load into Cipher
If you will need to reuse similar load lookups in the future, follow these steps to create the initial export parameters.
- Log into Counterpoint
- Select Data Interchange → Export
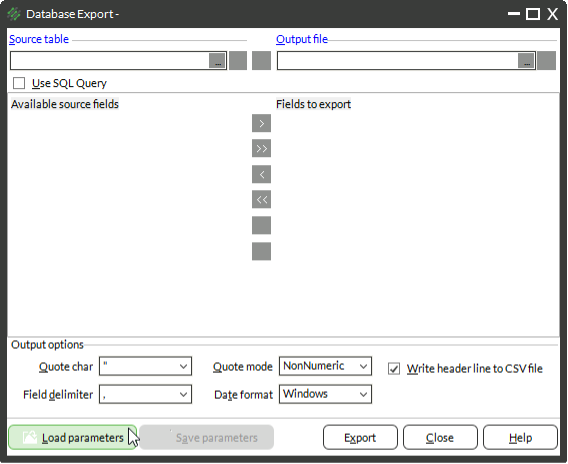
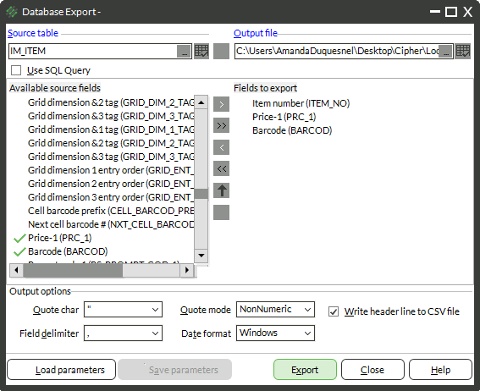
- From Source table, select IM_ITEM
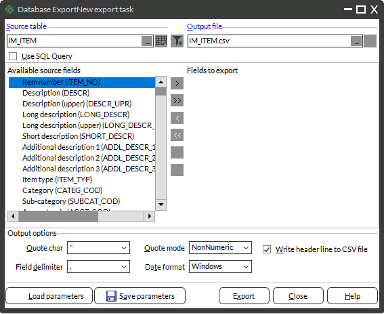
- Click the … next to Output file
- Choose a folder for the export (C:CipherlabCustom)
- Enter a File name (e.g. LookupData.txt)
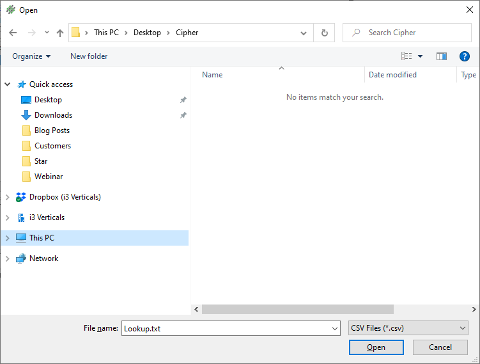
- Click Open
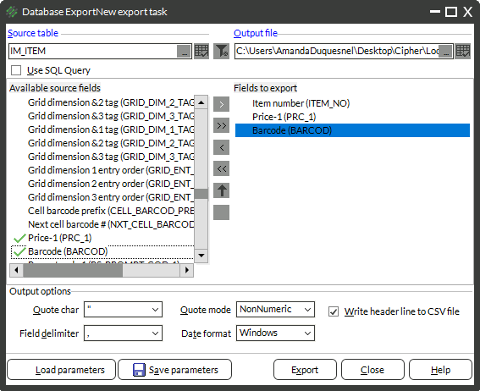
- Add the following Fields to the Fields to export area
NOTE: THEY MUST BE IN THIS ORDER FOR THE LOOKUP TO FUNCTION.
a. Item Number (ITEM_NO)
b. Price-1 (PRC_1)
c. Barcode (BARCOD)
- Click the Filter funnel icon
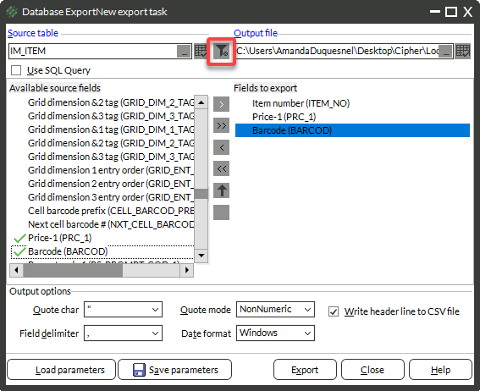
- Use filter to define what items should be included in the Lookup file
NOTE: You can customize the filter to support other methods of filtering.
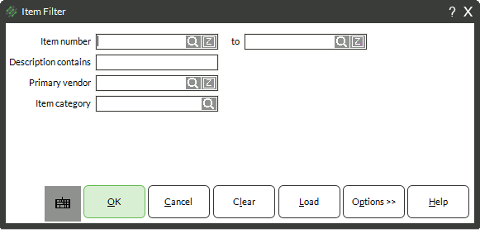
- Click OK
- If you need to use this Load Lookup in the future, click Save parameters
- Enter a Name for the saved export parameters
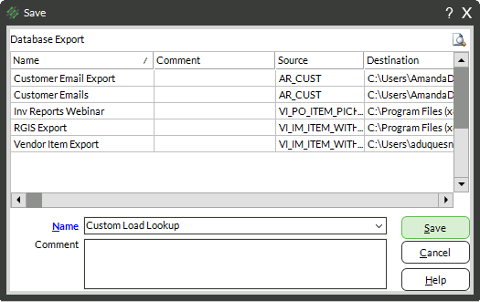
- Click Save
Loading the Saved Lookup Parameters and Creating Lookup File
If you have already created the Load Lookup parameters, follow these steps to load the existing parameters for export.
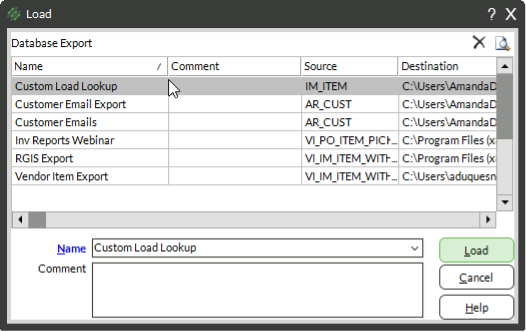
- In Counterpoint, Select to Data Interchange → Export
- Select the parameters to load and click Load
- Click the Filter Button at the top and adjust the Item Filter as necessary
- Verify or change the Output file location or file name
Exporting Data
Once you have created a new export or loaded parameters, follow these steps to create the export file.
- Click EXPORT
- If prompted, answer YES to over-write the existing file
Clearing Old Lookup Data
To make sure that old lookup data is not still on the Cipher handheld unit, you must reload the Cipher Program.
- From the desktop shortcuts, double-click the Load Program shortcut
- On the Cipher, select Utilities → Load Program
- Press a Blue Button on the Cipher. The Cipher should show Connecting…
- Place the Cipher in the cradle
- In the Load Program window, click OK
Loading Lookup File into Cipher
- On the Desktop → Right-click/Run as Administrator the “DLookup” program
NOTE: If you do not have a DLookup program on the desktop, open a file explorer and navigate to
C:CipherLabForgeBatch8 SeriesUtilities and use the DLookup program from there - Browse for the exported file to be uploaded to the cipher e.g. C:CipherlabCustomLookupData.txt
- Set the connection type to CRADLE-IR
- Set the ComPort to match what the device is connected to
- On the Cipher, select Utilities → Load Lookup
- When it says Connecting put Cipher in base station
- Back on the desktop – Click OK – to the Load Lookup
- Program should load the lookup
- Process is Completed with “Downloaded Completely!!” message
Testing the Lookup
- On the Cipher, select Collect
- Choose a collection mode (Item or Item + QTY)
- Scan a barcode of an item that should be included in the lookup
- Make sure that the Cipher does not show an error
- If you chose the Item + QTY collection method, enter a Quantity and press a blue button
- Scan a barcode of an item that should NOT be included in the lookup
- Verify that the Cipher beeps and an error displays on the screen
- Press ESC until back at the Main Menu
- Select Utilities → Delete Data → All Data
- Answer Yes to confirmation
- A Deleted confirmation shows. Press ESC to return to Main Menu
- The Cipher is now ready for the count


