Counterpoint supports the use of Profile fields to add/collect additional information on records such as:
- Items
- Customers
- Tickets
- Purchasing Documents
There are a few options for what data can be captured in a Profile field: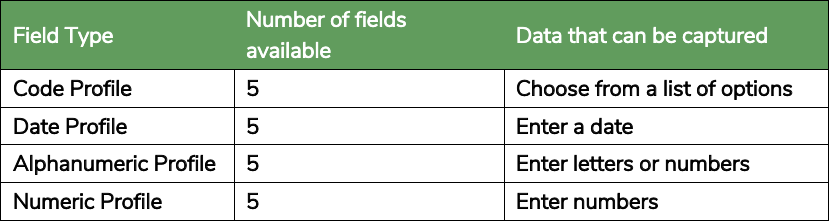
Possible Data
Some possible options you might want to capture using Profile Fields are:
- For Items
- Next reorder date
- Additional categorization of an item
- For Customers
- Birthdate/Birth Month for marketing
- Expiration date for a customer club
- For Tickets
- Zip code of customer for demographics
- Survey questions
- For Purchasing Documents
- Date payment is due
- Check number used to pay for items
Setting Up Profile Fields
- Select Setup → System → Quick Setup
- Click the Tab for the record type

- Check the Use checkbox for all fields you plan to use
- Enter a Display label for all fields you plan to use

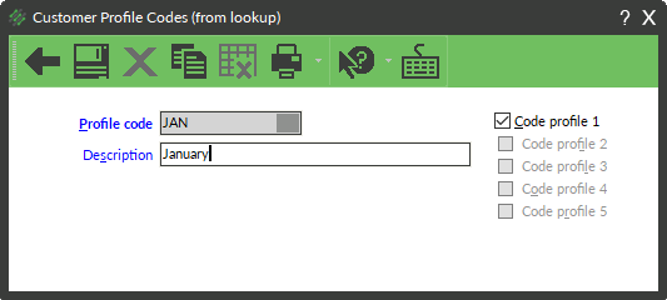
- If defining a Code Profile, click the Codes button and add options that can be used for the profile
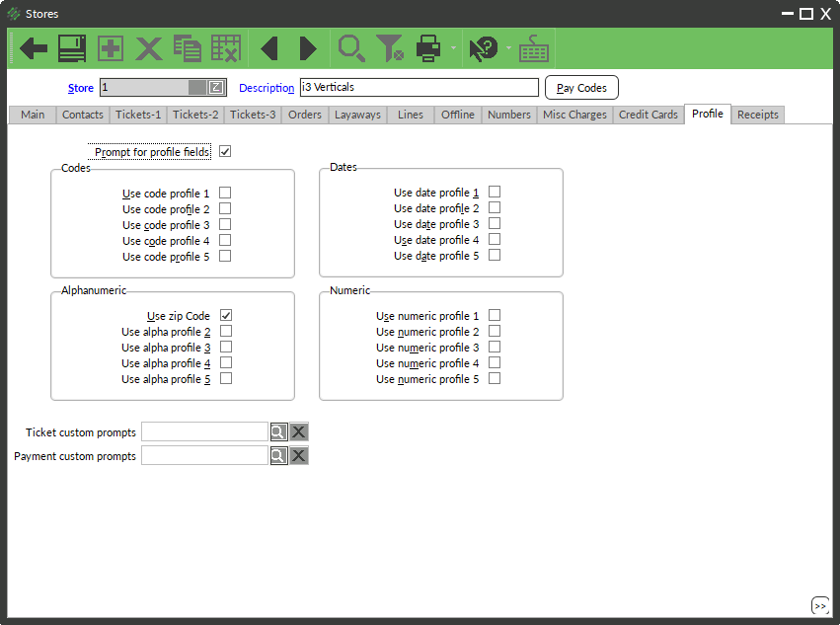
Setting Up Stores to Use Profile Fields
If you are choosing to use Profile Fields for Tickets, you will need to choose which stores in your database will use which fields.
- Select Setup → Point of Sale → Stores
- Enter or look up your store
- Click the Profile Tab
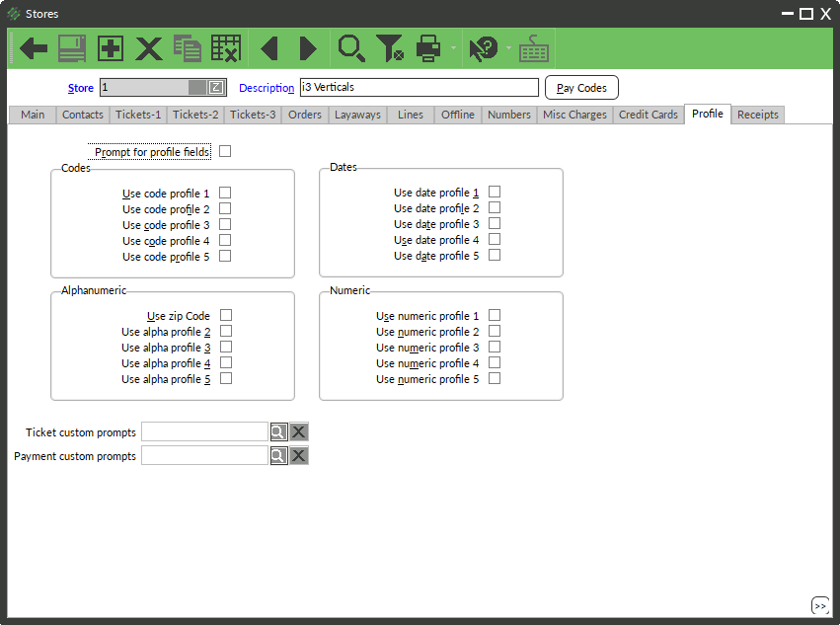
- Check the box for Use Profile field

- (Optional) Check the box for Prompt for profile fields if you want Counterpoint to prompt for these fields on every ticket
Updating Profile Fields
For Item and Customer records, you will use the Record Maintenance windows to enter the profile fields (Inventory → Items or Customers → Customers). For Purchasing documents, you will use the document Enter window e.g. Purchase Requests Enter (Purchasing → Purchase Requests → Purchase Requests Enter) or Receiving Enter (Purchasing → Receivings → Receivings Enter). All three of these windows have a profiles tab that you can use to enter/update the profile fields.The Ticket Profile fields can either be accessed from a button in Touchscreen Ticket Entry or from a prompt window that can be set to pop up for every transaction.